
Cypress 가 뭐지?!
회사에서 새로운 기능을 담당하게 되어서 열심히 개발하는 염딩코씨.

그는 기존에 존재하는 코드들을 조금씩 손을 보기 시작했는데,,,
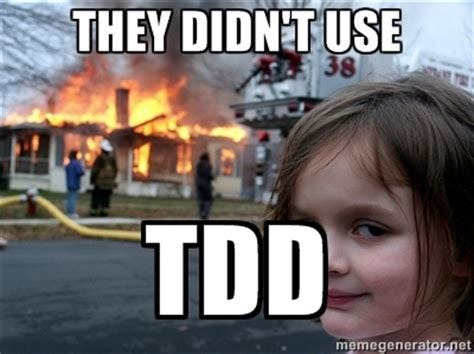
테스트 코드가 존재하지 않기 때문에 두려움에 떨고 있었다..
미래를 위해 테스트 코드를 "밋팀" 프로젝트에 적용해보기로 하고, 테스트 코드 맛보기를 하고 있었다.
Cypress는 E2E Test에 용이했고, UI로 테스트 과정을 직접 확인할 수 있어서 끌렸다.
TDD의 중요성을 깨닫고 시작하는 Cypress 스터디 레츠고!!
시작
진행하고 있는 프로젝트에 cypress 설치 npm install cypress
다시 시작
npm run dev
새로운 터미널을 열고 cypress를 실행시킨다.
npx cypress open(권한 필요)
cypress 창이 열리고, 원하는 테스트 종류를 선택해서 진행한다.
이번 코스에서는 E2E 테스트를 진행한다.
+ new spec 을 클릭하여 새로운 테스트를 진행할 파일을 생성할 수 있다.
describe('tasks page', () => {
  it('should render the main image', () => {
    cy.visit('<https://example.cypress.io>')
  })
})

// describe: 테스트 설명 (테스트 묶음 이름, 실행할 테스트 익명)
// it: 관련 테스트의 집합 중 하나
// should render the main image: 테스트 이름, 주로 문장으로 형성한다.
visit 명령어 - 페이지 방문하기
describe('tasks page', () => {
  it('should render the main image', () => {
    cy.visit('<http://localhost:5137>')
  })
})

// visit명령어는 굉장히 중요한 명령어
// 테스트 시작부분에 항상 실행되어야 한다.
// cy Object - globally available, 모든 명령어를 제공하는 객체.
// 방문에 실패하면 테스트도 실패한다.
localhost에 방문이 되지 않는다면
package.json에서 “dev”: “vite —host”로 수정해본다.
get 명령어 - 페이지 요소 가져오기
describe('tasks page', () => {
  it('should render the main image', () => {
    cy.visit('<http://localhost:5137>');
    cy.get();
  })
})

// 페이지의 요소들이 있는지 없는지 파악하기 위해서 가져오는 테스트이다.
IDE에 cy를 입력했을 때, 모든 completion을 가져오지 않을 수도 있다.
/// <reference types=”Cypress” />
이와 같이 최상단에 입력을 하면 모든 명령어를 얻게 된다.
위의 이미지를 찾기 위해서 어떻게 해야할까?
get은 페이지에서 요소를 찾기 위해 사용한다.
인자로 css className 또는 태그명을 넣어줄 수도 있다.
describe('tasks page', () => {
  it('should render the main image', () => {
    cy.visit('<http://localhost:5137>');
    cy.get('.main-header img'); // 대신 모든 img태그를 찾게 된다.
  })
})

// .class-name
// #some-id
// [type="text"]
// 위의 css 선택자를 사용할 수 있다.
이렇게 하이라이트되는 것을 확인할 수 있다.
get을 이용하여 contents(text) 확인하기
/// <reference types="Cypress" />

describe("template spec", () => {
  it("passes", () => {
    cy.visit("<http://localhost:5173>");
    cy.get(".main-header img");
  });

  it("should display the page title", () => {
    cy.visit("<http://localhost:5173>");
    cy.get("h1").contains("React Tasks");
    cy.contains("My Cypress Course Tasks");
  });
});

// contains는 특정 text가 있는지 확인한다.
// element를 신경쓰지 않는다면 cy.contains로 바로 사용할 수 있다.
Implicit and Explicit Assertions
https://docs.cypress.io/guides/references/assertions
공식문서를 참고하여 명시적 기대치를 추가해보자.
/// <reference types="Cypress" />

describe("template spec", () => {
  it("passes", () => {
    cy.visit("<http://localhost:5173>");
    cy.get(".main-header img");
  });

  it("should display the page title", () => {
    cy.visit("<http://localhost:5173>");
    cy.get("h1").should("have.length", 1);
    cy.get("h1").contains("React Tasks");
  });
});

// should를 추가하여 명시적 기대치를 추가할 수 있다.
// 위에서는 h1 태그와 관련된 기대치가 되겠다.
// have.length 같은 경우에는 두 번째 인자로 숫자를 받지만,
// exist를 넣는다면 인자는 받지 않게된다.
get() vs find()
/// <reference types="Cypress" />

describe("template spec", () => {
  it("passes", () => {
    cy.visit("<http://localhost:5173>");
    cy.get(".main-header img"); // 요소를 찾는 방식(nested)
    cy.get(".main-header").get("img"); // 요소를 찾는 방식 - 이것은 옳지 않은 방법
    cy.get(".main-header").find("img"); // 옮은 방법
  });

  it("should display the page title", () => {
    cy.visit("<http://localhost:5173>");
    cy.get("h1").should("have.length", 1);
    cy.get("h1").contains("React Tasks");
  });
});

// cy.get(".main-header").get("img")이 방식은 img 태그가 main-header의 하위에서
// 벗어나도록 img 태그의 위치를 옮겨도 cypress는 pass로 인식한다.
// 우리가 생각한 방식으로 동작하지 않는다.
// 이것이 contains와의 차이점이다.
// 또는 find를 사용해도 좋다.
User interaction test
이 버튼을 누르는 테스트 코드를 작성해보자.
/// <reference types="Cypress" />

describe("tasks management", () => {
  it("should open and close the new task modal", () => {
    cy.visit("<http://localhost:5173>");
    cy.contains("Add Task").click(); // Add Task 클릭
  });
});
Cancel 버튼을 클릭하여 모달을 닫아보자.
/// <reference types="Cypress" />

describe("tasks management", () => {
  it("should open and close the new task modal", () => {
    cy.visit("<http://localhost:5173>");
    cy.contains("Add Task").click();
    cy.get(".backdrop").click({ force: true }); // 쉬운 방법
  });
});

// 사용자가 모달 밖 영역을 클릭할 수도 있기 때문에, 위의 코드는 유의미하다.
// 좋은 테스트 방식은 아닌 점을 인지하고 있자.
추가 작업
/// <reference types="Cypress" />

describe("tasks management", () => {
  it("should open and close the new task modal", () => {
    cy.visit("<http://localhost:5173>");
    cy.contains("Add Task").click();
    cy.get(".backdrop").click({ force: true });
    cy.get(".backdrop").should("not.exist");
    cy.get(".modal").should("not.exist");
  });
});

// 예를 들어, 바깥 모달을 닫는 로직을 잘못 작성했을 수도 있다.
// 그 버그까지 확인할 코드가 필요하다.
// should("not.exist")로 이를 해결할 수 있다.
사용자 입력 시뮬레이션, 좋은 테스트 코드 예시
describe("tasks management", () => {
  it("should create a new task", () => {
    cy.visit("<http://localhost:5173>");
    cy.contains("Add Task").click();
    cy.get("#title").type("Dinner appointment");
    cy.get("#summary").type("Dinner with friends");
    cy.get(".modal").contains("Add Task").click();
    cy.get(".modal").should("not.exist");
    cy.get(".task").should("have.length", 1);
    cy.get(".task h2").contains("Dinner appointment");
    cy.get(".task p").contains("Dinner with friends");
  });
});

// type 명령어를 이용하여 사용자가 입력할 텍스트를 지정할 수 있다.
// Add Task 버튼이 두 개인 상황에서
// cy.contains("Add Task").click(); 이렇게 작성을 해도 동작은 하지만,
// 더 명확하게 어떤 영역에 있는 Add Task 버튼인지 알려주면 좋기 때문에 위와 같이 작성한다.
부분적으로 에러메세지 확인하기
it("should validate user input", () => {
  cy.visit("<http://localhost:5173>");
  cy.contains("Add Task").click();
  cy.get(".modal").contains("Add Task").click();
  cy.contains("Please provide values");
});
드롭다운 메뉴 선택
it("should filter tasks", () => {
    cy.visit("<http://localhost:5173>");
    cy.contains("Add Task").click();
    cy.get("#title").type("Dinner appointment");
    cy.get("#summary").type("Dinner with friends");
    cy.get("#category").select("urgent");
    cy.get(".modal").contains("Add Task").click();
    cy.get(".task").should("have.length", 1);
    cy.get("#filter").select("moderate");
    cy.get(".task").should("have.length", 0);
  });

 // select에는 실제로 보이는 값 또는 보이지 않는 값을 설정할 수 있다.
More Queries
https://docs.cypress.io/api/commands/and
it("should add multiple tasks", () => {
    cy.visit("<http://localhost:5173>");
    cy.contains("Add Task").click();
    cy.get("#title").type("Task 1");
    cy.get("#summary").type("First task");
    cy.get("#category").select("moderate");
    cy.get(".modal").contains("Add Task").click();
    cy.get(".task").should("have.length", 1);

    cy.contains("Add Task").click();
    cy.get("#title").type("Task 2");
    cy.get("#summary").type("Second task");
    cy.get("#category").select("moderate");
    cy.get(".modal").contains("Add Task").click();
    cy.get(".task").should("have.length", 2);
    cy.get(".task").eq(0).contains("First task");
    cy.get(".task").eq(1).contains("Second task");
  });

  // first(), last(), eq() 등등이 있다.
다음번에는 심화편으로 기록할 예정이다.
항상 테스트 코드를 작성하는 것이 바람직한지는 모르겠다.
때로는 필요없을 수도 있지만, 유지보수 관점에서 매우 중요한 것은 맞는 것 같다.
테스트 코드를 작성하는 시간이 아까울 수도 있지만, 미래에 발생할 수 있는 버그를 예방해주는 차원에서 보면
오히려 시간을 아낄 수도 있을 것 같다.
'Front-End' 카테고리의 다른 글
| 리렌더링 최적화 - 2편 (0) | 2025.02.17 |
|---|---|
| 리렌더링 최적화 - 1편 (2) | 2025.01.26 |
| 토스페이먼츠 결제 연동하기 (0) | 2025.01.14 |
| [TIL] LCP 최적화 도전하기..! (1) | 2024.10.11 |
| 웹어셈블리(WebAssembly)란? (2) | 2023.05.21 |